How to install a bathtub? I’ve shared some tips that might be helpful for DIYers. This guide covers the basics and includes some practical tricks I learned along the way. Step 1: Check for leaks Before installing the bathtub, it’s important to test the plumbing. Start by installing the water fixtures and running water for 24 hours. Look for any signs of leakage, especially around the overflow. To make this easier, you can fill the bathtub with water and check if any leaks appear. If the overflow is not working properly, it could cause issues later on. Once the bathtub is in place, align it carefully with the faucet. The center of the tub should match the center of the mixing valve. If they don’t line up, it could be hard to install the faucet properly. After placing the tub, fill it with water, close the valves, and check for leaks again. If the water overflows, you can reach underneath the tub and feel the overflow area to ensure there's no seepage. During my test, I noticed a small leak coming from a sand hole in the copper pipe under the floor. It wasn’t visible at first, but when the tub was full, the pressure made the leak more obvious. This shows how important it is to do thorough testing before finalizing the installation. A professional might have missed this issue, so taking extra time to check is worth it. Step 2: Leveling the tub When positioning the bathtub, make sure one end is slightly higher than the other. This helps with drainage and prevents water from pooling. I used a level to adjust the four sides of the tub. Once balanced, I tested it with water, and it drained quickly—just as expected. This not only ensures proper function but also keeps the tub looking clean and neat. Step 3: Filling the base Cast iron bathtubs are strong, but they conduct heat quickly. To improve insulation, I filled the bottom with river sand. Some professionals recommend foam, but I found sand to be more effective at filling gaps. The challenge was preventing the sand from entering the drain pipes. I used a temporary barrier to keep it out during the process. After everything was in place, I did another water test to make sure the tub didn’t shift and cause leaks. Once confirmed, I waited for the mason to build the skirt around the tub. Step 4: Installing the skirt I left a 300mm x 400mm opening at the drain and cut a wooden board to fit. I used waterproof wood and arranged bricks on it before attaching them. This makes future maintenance easier. For aesthetics, I chose to build the skirt to a height of 600mm, using the same tiles as the lower wall and floor. This creates a cohesive look throughout the bathroom. Step 5: Tiling the skirt Tiling the skirt isn’t too difficult, but it requires attention to detail. I applied a layer of cement mortar and set the tiles for two days. Since the floor has a slight slope and the tub is flat, each tile had to be cut to fit. I trimmed them gradually to avoid mistakes. The top edge of the tiles was tucked under the curved edge of the tub to prevent sharp angles. Important Tips: (1) Leave a small gap between the tub and the wall, then fill it with brickwork. The top of the brick should be about 2cm below the tub’s rim to allow for tiling. (2) Install the bathtub after the walls are finished. Remove the wall groove to make room for the tub, then trim it properly to avoid leaks. (3) After connecting the drain pipe, perform a drainage test to ensure no leaks occur. (4) Apply glass glue where the tub meets the wall and skirt. This helps prevent moisture buildup and extends the tub’s lifespan.
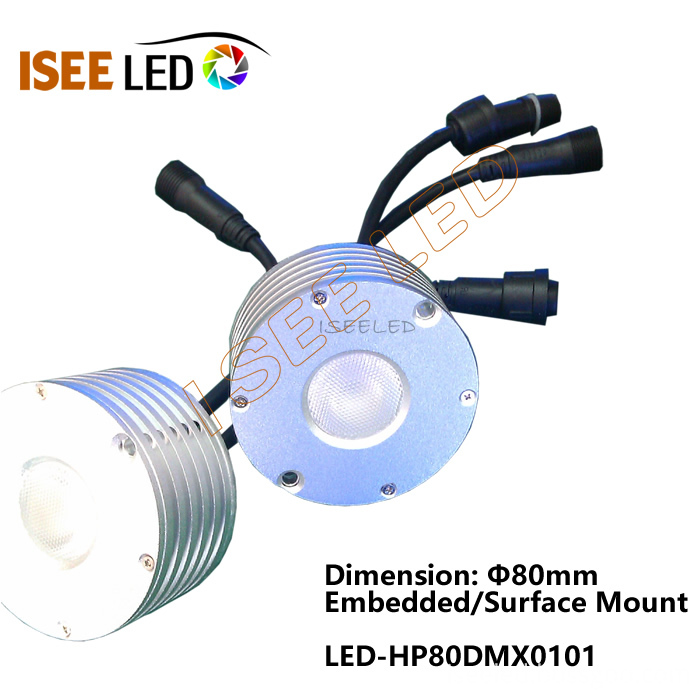
The high power led pixel light can be used as the outdoor led lighting , building lights and madrix lighting . All of them are compatible of madrix software and Artnet Controller, dvi controller, sunlite LED Controller. As for the high power led pixel light, we have the 64mm diameter, 80mm diameter and 78mm diameter. All of them use the hgih power led. Therefore, they are the power led light fixtures. They can make auto-set dmx address and manual-set dmx address versions for your building lights project.
Photo show of High Power LED Pixel Light:
High Power Led Pixel Light,Outdoor Led Light,Building Led Pixel Light Shenzhen Iseeled Technology Co., Ltd. , https://www.iseeledlight.com